Pergola foundations: footing types, depth and the 3 soil conditions that decide
 Save
A stable pergola starts underground. The footing type, depth and concrete mix depend on your post size, soil conditions and whether the structure stands freely or leans against the house. Blakesleys covers the main footing methods, the depths that work and how to choose the right approach for your garden.
Footing types for pergola posts
Three methods anchor pergola posts: concrete-filled holes, above-ground metal shoes and screw-in ground anchors. Each suits different soil, budgets and timescales.
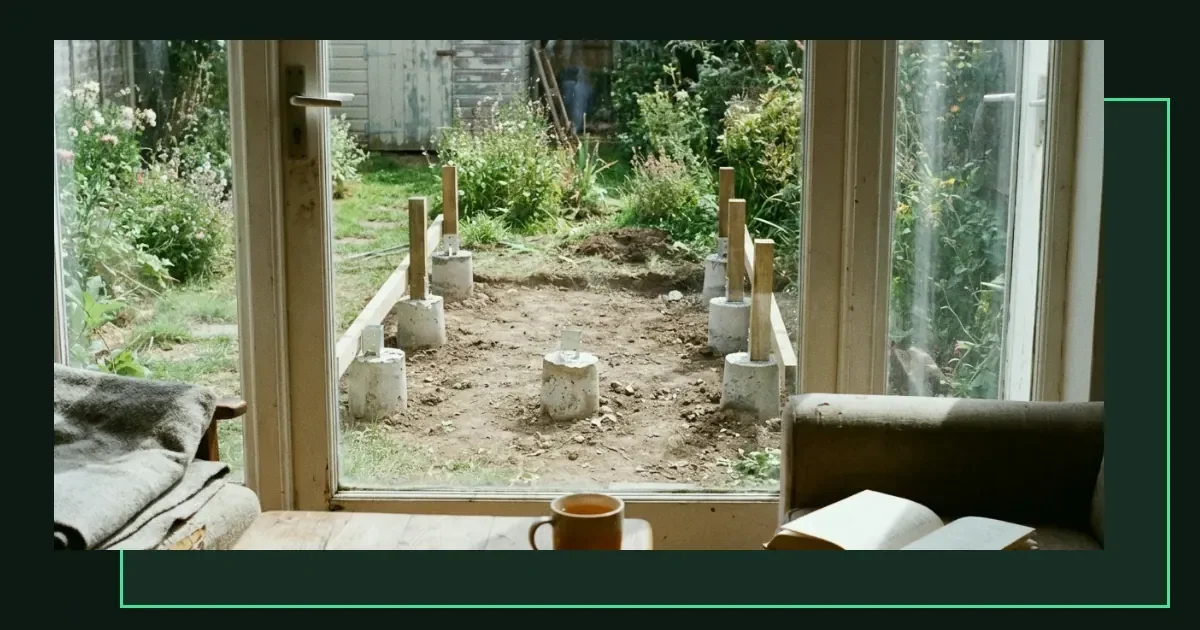
Concrete-filled post holes give the strongest hold. Dig a hole, set the post or a metal bracket in wet concrete and let it cure. The post sits below ground level or rests in a bracket just above it. This method works in most soils and carries the weight of heavy beams and roof panels without movement.
Post shoes fix to a concrete pad or existing paving. The metal bracket bolts down and the timber post slots into it, keeping the end of the wood clear of damp ground. Shoes work well on patios or decking where digging is difficult, though the shallower anchor means the structure must be braced more carefully.
Ground anchors screw into firm soil without concrete. A steel spike with a square collar twists down and the post bolts to the top. These install quickly and suit lighter pergolas on stable ground, but they struggle in soft or stony soil and offer less resistance to sideways loads than concrete.
Depth and diameter for post footings
The hole depth depends on post height and exposure. A freestanding pergola with posts under two and a half metres tall needs footings at least half a metre deep in firm soil. Taller posts, corner positions or exposed gardens push that to six hundred millimetres or more.
Width matters as much as depth. A hole three times the post width gives room for concrete to grip and spread the load. For a ten-by-ten-centimetre post, dig a hole at least thirty centimetres across. Clay soils hold shape well; sandy ground benefits from a wider base to resist settlement.
Worth remembering: frost heave lifts shallow footings in winter. If your garden freezes hard, dig below the frost line—typically four hundred and fifty millimetres in southern England, deeper further north.
Concrete mix and curing time
A general-purpose mix of one part cement, two parts sand and three parts aggregate handles most pergola posts. Pre-mixed bags labelled for fence posts or general use save measuring and work for small projects. For four posts you'll need eight to twelve bags, depending on hole size.
Pour the concrete in layers, tamping each one to remove air pockets. Set the post or bracket while the mix is workable, check it's plumb with a spirit level in two directions, then brace it until the concrete sets. Initial set takes a few hours; full strength arrives after a week.
In practice: avoid concreting in frost or heavy rain. Cold slows curing and water weakens the mix. If the forecast turns, cover fresh concrete with a sheet weighted at the edges.
How soil type changes your approach
| Soil type | What it does | Footing adjustment |
|---|---|---|
| Clay | Shrinks when dry, swells when wet | Dig deeper to reach stable layers; wider holes spread seasonal movement |
| Sand or gravel | Drains fast, less grip | Flare the base or add a concrete collar below ground to lock the post |
| Chalk or rock | Hard to dig, excellent drainage | Shallower footings acceptable if you reach solid material; hire a breaker for tough spots |
Soft or waterlogged ground needs special attention. If the soil stays wet year-round, consider raising the pergola on a gravel bed with drainage channels, or use taller posts with footings that reach firmer layers below.
Testing your soil before you dig
Dig a test hole half a metre deep in each corner where a post will go. Squeeze a handful of damp soil: clay forms a sticky ball, sand crumbles apart, loam holds shape but breaks with light pressure. Fill the hole with water and time how long it takes to drain—gone in an hour means free-draining, still there the next morning means you'll need deeper footings or drainage.
Fixing posts in existing paving or decking
Bolting post shoes to a concrete patio or stone slabs skips digging but demands a solid base underneath. The slab must be at least seventy-five millimetres thick and sit on compacted hardcore, not loose soil. Drill through the paving, fix the shoe with resin anchors or expanding bolts, then slot the post into the bracket.
Timber decking poses a different problem. A post shoe can bolt to the joist beneath the boards if that joist runs on concrete pads or a dwarf wall. Never hang the full weight of a pergola from boards alone—the structure will move and the fixings will work loose. Where no solid footing exists under the deck, lift a board and dig a hole for a new concrete pad, then replace the decking around the base.
Step-by-step: setting a post in concrete
- Mark the post positions with string lines and pegs, checking diagonals to confirm the layout is square.
- Dig each hole to the depth and width you need, piling the spoil on a sheet to one side.
- Compact the bottom of the hole with the end of a timber offcut, then add fifty millimetres of gravel for drainage.
- Mix the concrete in a barrow or hired mixer, adding water gradually until the mix is stiff but pourable.
- Pour concrete to half the hole depth, set the post or bracket in place, then fill around it, tamping as you go.
- Check the post is plumb in both directions with a spirit level, adjust if needed, then brace it with scrap timber nailed to stakes driven into the ground nearby.
- Slope the top of the concrete away from the post so water runs off, then leave it to cure for at least three days before removing the braces.
Metal brackets versus timber in the ground
Burying a timber post directly in concrete invites rot at the point where wood meets moisture. The post end soaks up water from the surrounding soil, and even treated timber degrades over time. Metal post brackets—galvanised or stainless steel stirrups set in the concrete—lift the timber clear and extend the pergola's life by years.
If you do set timber into concrete, use posts pressure-treated to the highest durability class, cut the base at an angle so water drains away and coat the buried section with bitumen paint. Even then, expect to replace the posts sooner than you would with brackets.
Lean-to pergolas and wall fixings
A lean-to pergola fixes one side to the house with a ledger board and stands the other on footings. The wall attachment carries half the roof load, so it must be secure. Bolt the ledger through into masonry or structural timber—never just into render or cladding—and use coach screws or resin anchors rated for the weight. Lean-to veranda: attached shelter for 5 garden scenarios explains the attachment in more detail.
The freestanding posts still need concrete footings, but because the wall takes some of the load you can sometimes reduce the hole depth by fifty millimetres compared to a fully freestanding structure. Check the wall is solid brick or block; cavity walls and some cladding systems may need specialist fixings or a freestanding frame instead.
When to add horizontal bracing
Shallow footings or lighter soil benefit from diagonal knee braces between posts and beams. A short length of timber fixed at forty-five degrees stiffens the frame and stops posts leaning under side loads from wind or climbing plants. Braces suit post shoes particularly well, where the anchor is above ground and less able to resist sideways movement.
Good to know: bracing changes the look of the pergola. If you want a clean frame, invest time in deeper footings and solid concrete rather than adding supports later.
Wind exposure and footing strength
Gardens on hilltops, open fields or near the coast face stronger winds. A pergola in an exposed spot needs deeper footings—add a hundred millimetres to the standard depth—and wider holes to spread the load. Roofed pergolas with polycarbonate or glass panels catch more wind than open frames, so treat them as exposed even in sheltered gardens. Timber size for a pergola: posts, beams and the 4 measures that decide covers the post dimensions that pair with robust footings.
Common mistakes and how to avoid them
Setting posts before the concrete has cured fully leads to movement. Leave braces in place for three days minimum, longer in cold weather. Removing them early lets the post shift, and once concrete has set you cannot adjust it without digging out and starting again.
Skipping the gravel base at the bottom of the hole traps water around the concrete. Fifty millimetres of gravel or crushed stone drains moisture away and prevents the footing sitting in a puddle during wet months.
Using too much water in the mix weakens the concrete. Aim for a consistency that holds its shape when you squeeze it but still flows around the post. A soupy mix is easier to pour but takes longer to cure and ends up softer.
Download PDF: Pergola Footing Checklist PDF, 28 KB
Frequently asked questions
How deep should pergola post footings be?
At least half a metre in firm soil for posts under two and a half metres tall. Taller posts, exposed gardens or soft ground need six hundred millimetres or more, and you should dig below the frost line where winters freeze hard.
What concrete mix do you use for pergola footings?
One part cement, two parts sand and three parts aggregate works for most pergola posts. Pre-mixed fence-post concrete is a convenient alternative. The mix should be stiff but pourable, and it needs three days minimum to cure before you remove bracing.
Can you put a pergola on a patio without digging?
Yes, if the patio is solid concrete or thick stone slabs on compacted hardcore. Bolt metal post shoes to the paving with resin anchors or expanding bolts, then fix the posts into the brackets. The slab must be at least seventy-five millimetres thick.
Do pergola posts rot in concrete?
Timber buried directly in concrete can rot where it meets moisture from the soil. Metal brackets set in the concrete and holding the post above ground last longer. If you do bury timber, use pressure-treated posts, coat the base with bitumen paint and expect to replace them sooner.
What size hole do you need for a pergola post?
At least three times the width of the post. For a ten-by-ten-centimetre post, dig a hole thirty centimetres across and half a metre deep in firm soil. Wider holes suit sandy ground or heavier structures.
Can you use ground anchors instead of concrete for a pergola?
Ground anchors work for lighter pergolas on stable, stone-free soil. They screw into the ground and the post bolts to the top, avoiding concrete and speeding installation. They offer less resistance to sideways loads than concrete footings and struggle in soft or stony ground.