 Choosing StructuresPergola or veranda: structure, shelter and the 3 factors that decide
Garden Verandas and Pergolas
- Choosing StructuresPergola or veranda: structure, shelter and the 3 factors that decide
 Building and InstallationAdding a roof to your pergola: 4 material choices and the structural checks that come first
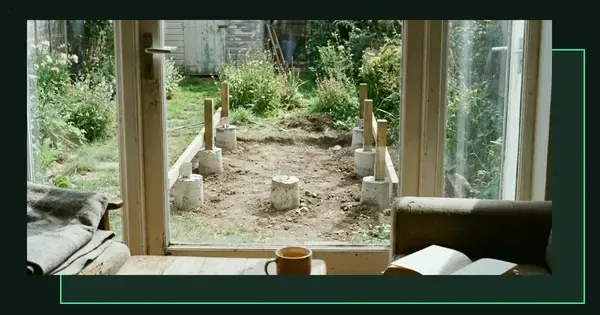 Building and InstallationPergola foundations: footing types, depth and the 3 soil conditions that decide
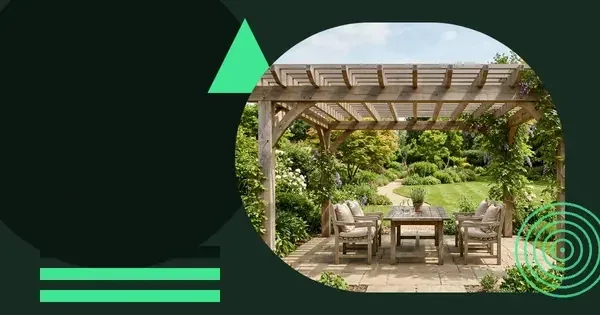 Choosing StructuresShade from a pergola: what the frame gives and 4 ways to add more
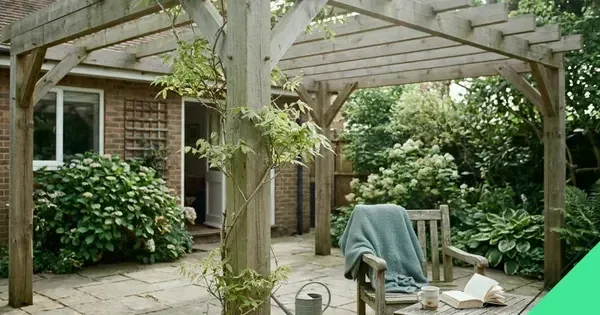 Materials and ToolsTimber size for a pergola: posts, beams and the 4 measures that decide
 Planning and RegulationsPlanning permission for a veranda: 5 rules that decide
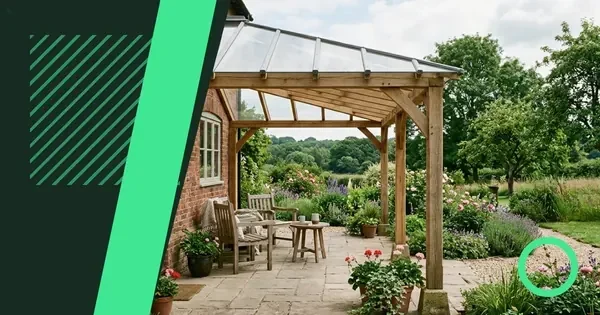 Choosing StructuresLean-to veranda: attached shelter for 5 garden scenarios
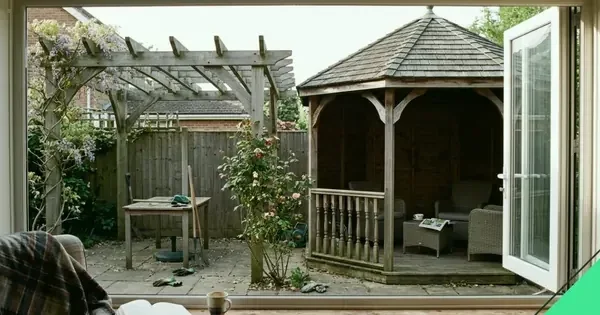 Choosing StructuresPergola vs Gazebo: 6 Key Differences to Help You Choose
Choosing Structures
- Choosing StructuresPergola or veranda: structure, shelter and the 3 factors that decide
- Choosing StructuresShade from a pergola: what the frame gives and 4 ways to add more
- Choosing StructuresLean-to veranda: attached shelter for 5 garden scenarios
- Choosing StructuresPergola vs Gazebo: 6 Key Differences to Help You Choose
A well-placed veranda or pergola redefines how a garden feels and functions. These structures turn underused patches into shaded retreats, extend the living space outdoors and anchor a scheme that might otherwise lack definition. Whether you're after year-round shelter or dappled summer shade, the right framework changes how you use the plot.
Common mistakes and where they lead
Choosing a structure before measuring the space is the single fastest route to regret. A pergola scaled for a show garden can overwhelm a modest plot, and a veranda positioned without thought for the sun's arc may cast shade where you want light or bake in afternoon heat. Proportion matters: the height, span and setback from boundaries all need working out on paper before a single post goes in.
Ignoring local planning rules is another trap. Some structures need approval, particularly if they're close to a boundary or attached to the house. The assumption that timber is always the safest choice overlooks how quickly softwood can deteriorate without proper treatment, and skimping on foundations to save time or money leaves the frame vulnerable to wind and subsidence.
Materials mismatched to the setting create jarring results. A contemporary aluminium pergola may look out of place against a Victorian terrace, just as rustic oak can feel incongruous beside modern render. Think about what already exists in the garden and the wider streetscape before settling on a finish.
Groundwork that gets skipped
Drainage under and around the structure is often an afterthought. Water pooling beneath decking or paving shortens the life of timber posts and creates slip hazards. A gentle fall away from the house, combined with permeable surfaces, solves most problems before they start. Check the existing levels and plan for water to move away cleanly.
Where to go next
Start by mapping the garden's orientation and noting where the sun falls at different times of day. Photographs taken at intervals through the seasons reveal patterns that aren't obvious from memory. Mark out the proposed footprint with canes or string and live with it for a week—walking around it, viewing it from windows, imagining furniture underneath. You'll quickly see whether the scale and position make sense.
Speak to neighbours if the structure will be visible from their side or affect their light. Early conversation heads off objections and planning disputes. Check the local authority's planning portal for permitted development limits: height, distance from boundaries and whether prior approval is needed. Rules differ for listed buildings and conservation areas.
Gather material samples and hold them up in the garden at the time of day you'll use the space most. Colours and textures shift dramatically under natural light, and what looked promising in a showroom may clash once it's installed. Compare at least three suppliers for each material, and ask for examples of completed projects in similar settings.
Budget and timeline
Set a realistic figure that includes groundwork, materials, labour if needed, and a contingency for unforeseen adjustments. Structures built in phases—foundation one month, framework the next, planting later—spread the cost and give you time to assess each stage. Rushing to finish before an event often leads to compromises you'll notice every time you step outside.
The basics: what defines each structure
A veranda is a covered platform attached to the house, typically roofed and open on at least one side. It shelters the entrance, provides a transitional space between indoors and garden, and offers protection from rain and strong sun. Traditional verandas have pitched or flat roofs supported by posts, with balustrades or low walls defining the edge. Modern interpretations may use cantilevered canopies or retractable awnings.
A pergola is a freestanding or attached framework, usually with an open roof of cross-beams or slats. It creates a sense of enclosure without blocking light entirely, and it's often used to frame a pathway, define a seating area or support climbing plants. The structure is lighter than a veranda, with no solid roof, and relies on repetition and rhythm—posts spaced evenly, beams parallel—to create its effect.
Both structures work with the landscape rather than imposing on it. A veranda extends the architecture of the house into the garden; a pergola can stand alone or link two areas, such as a patio and a shed, with a covered walkway. The choice depends on how much shelter you need, where the structure will sit and what role it plays in the overall design.
Materials and their trade-offs
Timber remains the most popular choice for both verandas and pergolas. Pressure-treated softwood is affordable and widely available but requires regular maintenance—staining or painting every few years to prevent rot and splitting. Hardwoods such as oak, sweet chestnut or iroko last longer and weather to a silver-grey patina, but the upfront cost is higher and the weight demands stronger foundations.
Aluminium and steel frames suit contemporary schemes. They're slim, strong and low-maintenance, with powder-coated finishes in a wide range of colours. Metal heats up in direct sun and can feel stark without planting to soften the lines. Composite materials—wood fibres bonded with resin—combine the appearance of timber with reduced upkeep, though they lack the warmth and texture of solid wood.
| Material | Lifespan with care | Maintenance level | Weight |
|---|---|---|---|
| Pressure-treated softwood | 10–15 years | Moderate to high | Light to medium |
| Hardwood (oak, iroko) | 25–40 years | Low | Heavy |
| Aluminium | 20–30 years | Very low | Light |
| Steel (galvanised, painted) | 20–35 years | Low to moderate | Heavy |
| Composite | 15–25 years | Low | Medium |
Practical steps: from concept to completion
Measure the area carefully, noting any slopes, existing hard surfaces and the position of drains or service pipes. Sketch the structure to scale on graph paper, marking post positions, beam spans and roof pitch if applicable. Decide whether the design will be attached to the house or freestanding, and check that fixings to masonry won't compromise damp-proofing or disturb lintels.
Order materials with a small surplus for cuts and adjustments. Timber dimensions can vary between suppliers, and metal sections may need custom lengths. If you're building the structure yourself, lay out all components before starting and double-check measurements at each stage. A frame that's a few centimetres out of square at the base will be visibly skewed by the time the roof goes on.
- Mark post positions with pegs and string, then dig holes to the required depth—typically 600mm for freestanding posts, deeper in soft or sandy soil.
- Set posts in concrete, checking they're vertical with a spirit level on two faces. Brace them with temporary supports until the concrete cures.
- Fix horizontal beams to the posts, ensuring they're level along their length. Use galvanised bolts or coach screws, and pre-drill to prevent splitting.
- Add cross-beams or rafters, spacing them evenly. For a pergola, these form the open roof; for a veranda, they support roofing sheets or tiles.
- Apply a protective finish to timber before final assembly, coating all faces including cut ends. Reapply every few years as the manufacturer recommends.
- Install any roofing, guttering or side panels, working from one end to the other. Check that water drains away from the house and that fixings are weatherproof.
Allow the structure to settle for a week or two before adding furniture or heavy planting. Check that bolts remain tight and that no movement has opened gaps. If climbing plants are part of the design, plant them at the base of posts and train them onto wires or trellis rather than wrapping stems directly around timber, which traps moisture.
Roofing options for verandas
A solid roof offers full weather protection and turns the veranda into a usable room for much of the year. Tiles or slates match a traditional house, while polycarbonate or glass panels keep the space light. Translucent sheets can create glare and heat buildup in summer; consider tinted or solar-control grades, or add a retractable blind underneath.
Open-slatted roofs provide partial shade and suit pergolas or hybrid designs. The spacing of slats controls how much sun filters through—narrow gaps for deeper shade, wider gaps for a lighter touch. Louvred systems adjust to the weather, closing for rain and opening for sun, though the mechanism adds cost and potential maintenance.
Choices and options: tailoring the design
Height affects both the feel of the space and what you can grow. A low pergola, with beams around two metres above the ground, creates intimacy and works well for wisteria or climbing roses. Taller structures—two and a half metres or more—feel more open and suit vigorous climbers such as grapevines. Check that the finished height, including any planting, won't block windows or overshadow neighbouring plots.
Post spacing determines the rhythm and strength of the frame. Posts set close together, at intervals of one to one and a half metres, create a enclosed, sheltered feel and support heavier roofing. Wider spacing, up to three metres, gives a lighter, airier structure but requires deeper foundations and thicker beams to maintain stability.
Orientation shapes how the structure is used. A veranda facing south or west catches afternoon and evening sun, ideal for sitting out but potentially too hot in high summer without shade. East-facing structures enjoy morning light and stay cooler later in the day. North-facing verandas receive little direct sun and suit spaces where shelter and architectural interest matter more than warmth.
Integrating lighting and planting
Low-voltage LED strips recessed into beams or wrapped around posts extend the usable hours without harsh glare. Solar-powered options avoid the need for wiring but give less consistent output. Position lights to illuminate steps, seating and pathways, and choose warm tones that complement natural materials.
Planting softens the structure and ties it into the wider garden. Deciduous climbers such as jasmine or clematis provide summer shade and die back in winter, letting in more light when it's needed. Evergreen options—ivy, trachelospermum—offer year-round cover but can become heavy and need annual pruning to prevent damage to timber. Plant in improved soil, add a layer of mulch and water regularly until established.
| Climber | Growth habit | Foliage type | Maintenance |
|---|---|---|---|
| Wisteria | Vigorous, twining | Deciduous | Prune twice yearly |
| Climbing rose | Moderate, needs tying | Deciduous | Deadhead, prune in winter |
| Jasmine (summer) | Fast, twining | Deciduous | Trim after flowering |
| Trachelospermum | Moderate, self-clinging | Evergreen | Light trim in spring |
| Grapevine | Very vigorous | Deciduous | Prune hard in winter |
| Ivy | Fast, self-clinging | Evergreen | Cut back annually |
Frequently asked questions
How do you prevent a timber pergola from rotting at ground level?
Set posts in concrete with the base raised slightly above ground level, allowing air to circulate around the timber. Use pressure-treated or naturally durable hardwood, and apply a preservative to cut ends before installation. Avoid wrapping planting or mulch directly against posts.
What spacing between pergola posts works best for climbing plants?
Spacing of one and a half to two metres gives climbers enough support without crowding. Vigorous plants such as wisteria can span wider gaps, but roses and clematis perform better with closer posts and horizontal wires or trellis between them.
How much headroom does a veranda need to feel comfortable?
A minimum of two metres between the floor and the underside of beams prevents the space from feeling cramped. Two and a quarter metres or more suits taller individuals and allows for hanging plants or lights without obstruction.
What foundation depth is required for a freestanding pergola?
Holes of at least 600mm deep, filled with concrete, provide stability in firm soil. Increase the depth to 750mm or more in soft ground or exposed sites. The diameter should be at least three times the post width.
How do you choose between a pitched roof and a flat roof for a veranda?
A pitched roof sheds rainwater more effectively and suits traditional or period properties. A flat roof—actually built with a slight fall—works with modern architecture and may be easier to integrate with the existing house. Check that the pitch or fall directs water away from walls.
What finish protects outdoor timber without darkening the grain?
Clear wood preservers or oils with UV filters protect against moisture and insect damage while letting the natural colour show. Reapply every two to three years, more often on south-facing timber. Avoid varnishes, which can crack and peel in outdoor conditions.