Lean-to veranda: attached shelter for 5 garden scenarios
 Save
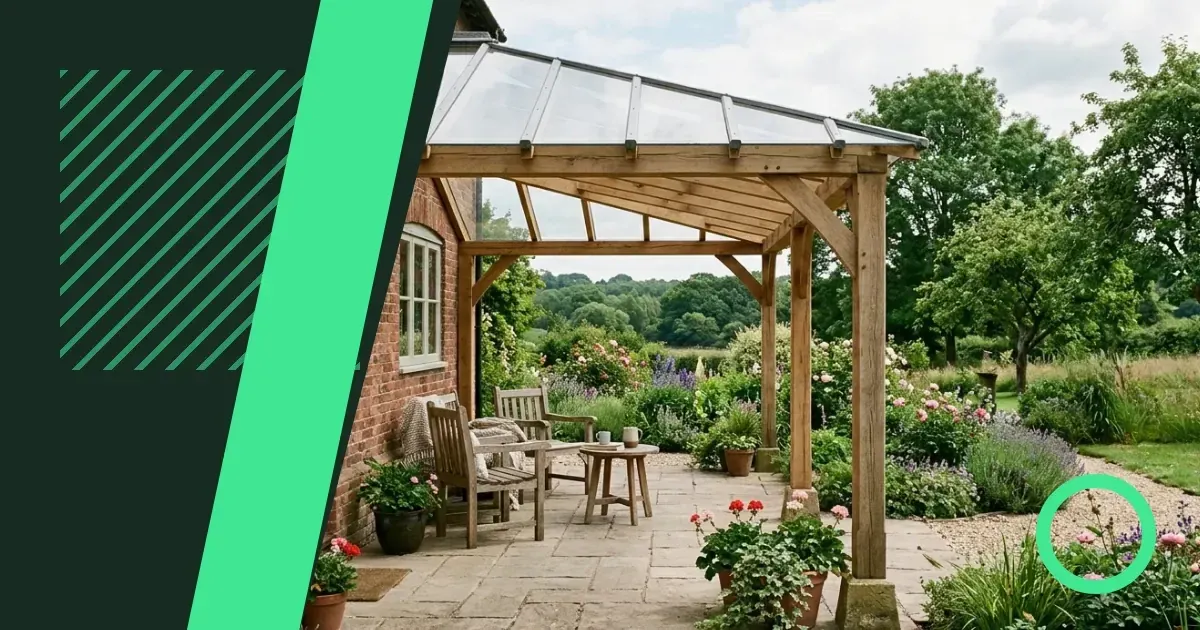
A lean-to veranda is a covered structure fixed to one wall of your house, with its roof sloping away from the building. The house wall carries half the weight, so you need fewer posts and less ground preparation than a freestanding frame. Blakesleys explains how this design works, where it makes sense, and what you gain compared to standalone garden structures.
Construction and how it differs from freestanding designs
The defining feature is the ledger board: a horizontal beam bolted to your house wall at the height you want the roof to start. Rafters or a polycarbonate sheet rest on this board at one end and on a row of posts at the other, creating a single-slope roof. Because the house takes the load on one side, you typically need only two or three posts along the front edge, spaced to match the span of your roofing material.
A freestanding veranda carries its own weight on all four corners, so every side needs posts and foundations. The lean-to borrows strength from the building, which cuts materials and digging. The trade-off is that you must fix the ledger securely—into masonry or through cladding into the frame behind—and ensure the join is weatherproof where the new roof meets the wall.
Materials and attachment points
Timber posts and beams remain the most common choice: softwood treated against rot for budget builds, hardwood or engineered timber where you want narrower sections. The ledger is usually the same thickness as the front beam to keep the structure square. Stainless-steel coach bolts or resin anchors fix it to brick; for timber-frame or steel-frame houses, you fasten through the cladding into studs or purlins, adding a flashing above to shed rain.
Polycarbonate sheets are lightweight and let diffused light through; glass panels give a cleaner look but cost more and need stronger posts. Both sit in aluminium bars that slot into grooves on the beams, so you can replace a panel without dismantling the frame.
Five situations where a lean-to works best
This design suits gardens and uses that benefit from being right against the house. Not every plot needs an attached structure, but the following scenarios show where the advantages outweigh the planning and fixing work.
- Small rear gardens. A lean-to hugs the back wall, leaving the rest of the lawn or planting beds open. A freestanding pergola in the middle of a narrow plot chops the space in two.
- Wet-weather access from the kitchen. Stepping under cover the moment you open the back door means dry seating within a stride. Useful when you want to move food, crockery or cushions between inside and out.
- Sloped sites. If your garden drops away from the house, building near the wall keeps at least one end on level ground. The posts at the far edge can be longer to meet the fall, and you avoid cut-and-fill across the whole site.
- Year-round dining or work space. Walls on three sides—your house plus optional side panels—block wind better than an open frame. Add a glazed roof and the zone stays usable through autumn and into early spring.
- Climbing-plant support where the wall is bare. Wisteria, jasmine or a grape vine can grow up the house wall and spread across the veranda roof, softening render or weatherboarding that looks stark on its own.
Planning permission and permitted development
In England, a single-storey rear extension—including a veranda fixed to the house—falls under permitted development if the structure does not project more than three metres from the original rear wall on a detached house, or four metres on a semi-detached or terraced property. The height at the eaves must not exceed three metres, and the overall height no more than four metres for a pitched roof. These limits assume no previous extensions have already used up your allowance.
Check with your local planning authority before you start. Conservation areas, listed buildings and certain Article Four directions remove permitted rights, and even where permission is not needed, building regulations may apply if you enclose more than half the veranda's perimeter or add heating.
Comparison: lean-to veranda, freestanding pergola and attached glass room
| Feature | Lean-to veranda | Freestanding pergola | Attached glass room |
|---|---|---|---|
| Posts required | Two to three along the front | Four or more, all sides | Two to four, with full glazing |
| Foundation work | Front posts only | Every post | Front posts plus slab or beam beneath sliding doors |
| Weather protection | Roof overhead, open or partly enclosed sides | Partial shade, open all round | Enclosed on all sides, insulated roof option |
| Typical cost | Mid-range | Lower | Higher |
When to choose something else
If your garden is large and the best view or sunniest spot sits away from the house, a freestanding pergola gives you freedom to site it wherever you like. If you want a room that stays warm enough to use in winter without outdoor clothing, a glass room with insulated panels and bifold doors makes more sense than a veranda, though it will need building-control approval.
Step-by-step approach to planning your lean-to
Before you order timber or book a builder, work through these tasks to confirm the design fits your wall, your garden and the rules that apply to your property.
- Measure the wall and check what sits behind it. Tap along the brickwork or cladding to find where the wall is solid masonry or where it is a cavity with an inner leaf. Mark the position of downpipes, airbricks, vents and utility boxes; your ledger must avoid all of them.
- Check permitted-development limits. Measure from the original rear wall of the house—not from any later extension—and confirm your planned projection and height stay within the thresholds. If in doubt, ask the planning department.
- Decide on roof material and calculate the span. Polycarbonate sheets often span two and a half metres without sagging; timber rafters spaced closely can carry glass panels across three metres. The span sets how far your posts stand from the wall.
- Mark post positions on the ground. Use string lines to check they are square to the house and level with one another. On sloped ground, adjust post lengths rather than digging stepped foundations.
- Plan drainage. A lean-to concentrates rainwater along the front edge. Decide whether runoff will soak into a gravel trench, flow into an existing drain, or collect in a water butt.
Maintenance and common pitfalls
The join between ledger and wall is the point most likely to leak. Fit a flashing that tucks under the house cladding or into a mortar joint, then seal the top edge with a flexible mastic that can move as timber expands. Inspect this join each autumn and reapply sealant if cracks appear.
Timber posts in contact with paving or soil will rot faster than those raised on metal shoes. Concrete the shoes into the foundations and bolt the posts on top, keeping the end grain clear of standing water.
Cleaning and seasonal checks
Moss and algae build up on polycarbonate and glass where overhanging branches or gutters drip onto the roof. Brush off debris twice a year and rinse with a hose; stubborn green stains lift with a soft brush and diluted patio cleaner. Check that the channels between panels have not clogged with leaves, which trap moisture and stain the edges.
Tighten the bolts that fix the ledger to the wall every other year. Timber shrinks as it dries, and slight movement can loosen the connection. Look for daylight gaps or water stains on the wall beneath the board; either means the flashing has lifted or the sealant has failed.
Related reading
If you are weighing up attached versus standalone structures, read our guide on the difference between pergolas and gazebos to see how open frameworks compare with fully roofed designs and which layout suits different garden shapes.
#Lean-to #Planning permission #Foundations
Download PDF: Lean-to veranda planning checklist PDF, 28 KB
Frequently asked questions
What does lean-to veranda mean?
A lean-to veranda is a covered outdoor structure with one side fixed to your house wall and a sloping roof supported by posts at the far edge. The house carries part of the load, so fewer posts and foundations are needed compared to a freestanding frame.
How does an attached veranda differ from a freestanding one?
An attached veranda bolts directly to the house using a ledger board, requiring posts only along the front. A freestanding veranda stands on its own four corners, needing posts and foundations on all sides but offering more flexibility in where you place it.
What are the main benefits of building a veranda against the house?
Building against the house saves materials and ground work, keeps one edge on level ground if your garden slopes, and gives you shelter the moment you step outside. It also works well in small gardens where a freestanding structure would cut the space in half.
Do I need planning permission for a lean-to veranda in the UK?
What materials work best for a lean-to veranda roof?
Polycarbonate sheets are lightweight, affordable and let diffused light through. Glass panels look cleaner and last longer but cost more and need stronger posts. Both fit into aluminium bars on the beams, making individual panels easy to replace.
How do I stop the join between the veranda and the house wall from leaking?
Fix a metal flashing above the ledger board, tucking it under your cladding or into a mortar joint, then seal the top edge with flexible mastic. Inspect the join every autumn and reapply sealant if cracks appear, as timber movement can open gaps over time.