Levelling Ground for a Pergola: 4 Preparation Steps That Get the Base Right
 Save
A pergola needs level ground so its posts sit square and the frame stays true. On sloped or uneven lawns, you prepare the area by marking the corners, removing turf and soil where the ground is high, and building up or compacting where it is low. The rest of this guide walks you through the tools, the measurements and the steps that get the job done, plus what to do when the slope is steep enough to need a different approach. Blakesleys covers the practical side of building garden structures you can rely on.
Why Level Ground Matters
Posts set on a slope lean, and a frame built on leaning posts racks. The pergola twists under its own weight, joints open and the structure weakens over time. A level base keeps the posts plumb, the beams horizontal and the load evenly spread across the foundations.
On uneven ground, one corner sits higher than the others. When you fix the posts at that height, the opposite corner either floats above the soil or forces you to bury posts to different depths, which leaves some with less support than they need.
Tools and Materials You Need
Gather these before you start:
- String line and pegs to mark the pergola footprint
- Spirit level and a straight timber batten long enough to span between opposite corners
- Spade and turf cutter for removing grass and topsoil
- Rake and wheelbarrow to shift soil
- Hardcore or compacted gravel if you are building up low areas
- Hand tamper or a hired plate compactor for firming the ground
A laser level speeds the job on larger plots, but a spirit level and batten work just as well for most garden pergolas.
Marking the Pergola Outline
Drive a peg into the ground at each corner of the planned pergola. Tie string line between the pegs to form the rectangle or square. Measure the diagonals: when they match, the corners are square. If one diagonal is longer, adjust the pegs until both measure the same.
Walk around the marked area and check where the ground rises or falls. The highest corner becomes your reference point. You will bring the other three corners up to that level, or cut the high corner back and build all four to a height between the highest and lowest points.
Checking the Slope
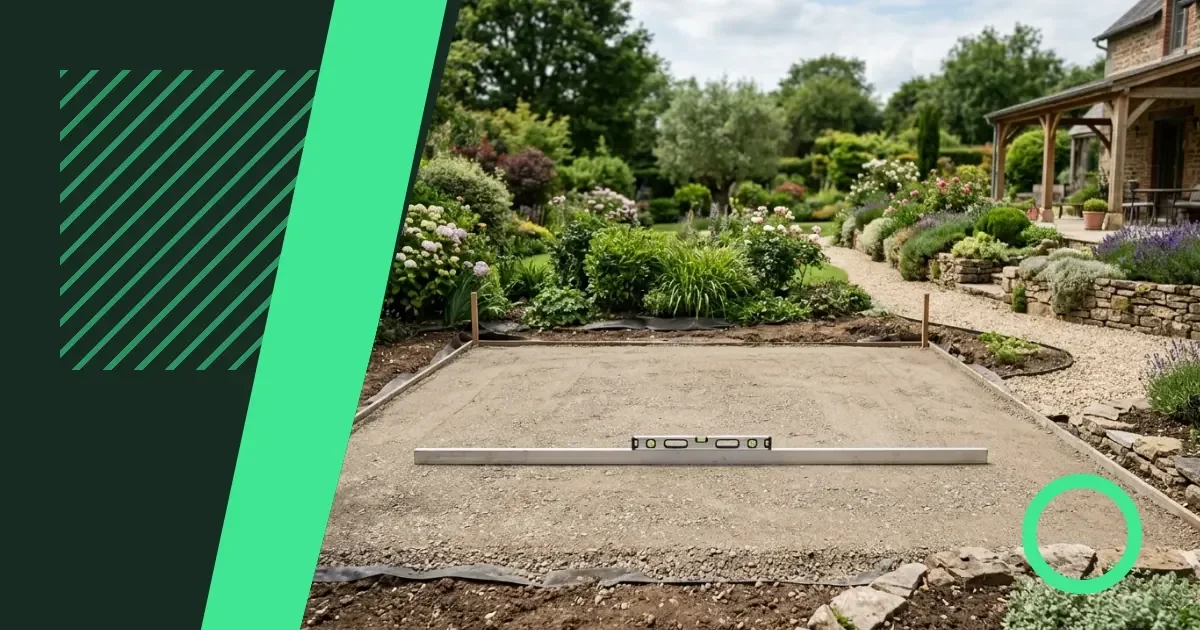
Lay a straight batten from the highest corner to the lowest. Rest a spirit level on top of the batten and lift the low end until the bubble centres. Measure the gap between the batten and the ground at the low end: that distance is the drop across that span.
A gentle slope needs only shallow cutting and filling. A steep drop—where the gap exceeds the depth of your planned footings—means the low corner would need posts buried far deeper than the high corner, or you build a raised deck or stepped foundation instead. For most domestic pergolas, a drop of less than the post-burial depth is workable with straightforward levelling.
Step-by-Step Ground Preparation
- Remove turf and topsoil from the highest areas first. Cut away grass and the loose soil beneath it until you reach firmer subsoil. Work inward from the high corner, checking your progress with the batten and spirit level as you go.
- Excavate further if the high corner still sits well above the low corners. Aim to meet somewhere between the natural high and low points, which reduces both the amount you dig out and the amount you need to fill in elsewhere.
- Fill low areas with hardcore or compacted gravel in layers. Spread each layer no thicker than your hand, then tamp it down hard with a hand tamper or plate compactor. Check the level after each layer and add more until the area is flush with the excavated sections.
- Compact the entire base once all four corners sit level. Go over the whole footprint with the tamper, paying attention to edges and corners where soil can stay loose. The ground should feel solid underfoot, with no give when you walk across it.
Leave the string lines in place after levelling. You will use them again when you mark out post positions and dig footings.
Working with Different Ground Types
Clay holds its shape when you cut it back but drains slowly, so low areas can stay waterlogged after rain. Lay a thin drainage layer of sharp sand or gravel under the compacted hardcore to move water away from post bases.
Sandy or loose soil shifts easily but compacts less firmly. You may need to excavate deeper and backfill with hardcore across the whole base, not just the low corners, to create a stable platform. Tamp every layer thoroughly.
Stony ground resists the spade but often drains well. Remove large stones as you level—they create voids under posts—and use the excavated stone as part of your fill material elsewhere, mixed with smaller gravel.
| Ground Type | Main Challenge | Best Fill Material |
|---|---|---|
| Clay | Poor drainage | Gravel with drainage layer |
| Sand | Low compaction | Hardcore, well tamped |
| Stony | Hard to dig | Excavated stone and gravel |
When to Build Up Instead of Cutting Back
On a steep slope, excavating the high side can mean shifting large volumes of soil and destabilising the ground behind the pergola. Building up the low side with a raised base or low retaining wall keeps the existing slope intact and gives you a level platform without the dig.
Raised bases need solid edging—treated timber sleepers or a low block wall—to hold the fill in place. The posts then fix to the raised surface, and the structure sits higher than the natural ground on the low side. This approach works well where the slope runs across the width of the pergola rather than along its length.
Freestanding vs Attached Structures on Slopes
A freestanding pergola on level ground can sit anywhere in the garden. An attached pergola or veranda fixed to the house needs the ground level to match the fixing height on the wall, which can mean more cutting or filling near the building. Plan the base level so the pergola roof meets the wall at a sensible height, clear of windows and below the damp-proof course.
Checking Your Work Before You Build
Once the ground is level and compacted, lay the batten across opposite corners and check the bubble again. Walk the whole area, pressing down with your heel: the surface should feel uniformly firm, with no soft patches or hollows.
If you are laying a patio or decking under the pergola, the levelled base is ready for that surface. If the posts will sit directly on footings dug into the ground, mark the post positions on the levelled surface and proceed with digging. The footings themselves must also be level at the base, so the posts rise vertically from an even starting point.
Common Mistakes and How to Avoid Them
Skipping the compaction stage is the most frequent error. Loose fill settles under the weight of the pergola, and posts drop out of level within weeks. Tamp every layer as you go, not just the top surface.
Using topsoil or turf as fill material leaves organic matter that rots and compresses. Strip all turf and loose topsoil away, and use only inorganic hardcore or gravel for filling low areas.
Levelling only the post positions rather than the whole footprint leaves an uneven surface under the pergola. If you plan to pave or deck the area later, an unlevel base makes that job harder. Level the full rectangle now, even if posts are all you are installing today.
Next Steps After Levelling
With the ground prepared, you can mark out the exact post positions, dig footings to the depth your soil and structure require, and set the posts plumb. The effort spent levelling the base pays back in a pergola that stands square, sheds water cleanly and lasts as long as the timber itself.
If you are adding a roof to create more shelter, read about adding a roof to an existing structure. The same attention to level groundwork applies whether you are building from scratch or adapting a pergola already in place.
Download PDF: Pergola Ground Levelling Checklist PDF, 28 KB
Frequently asked questions
Can you build a pergola on sloped ground without levelling it?
You can set posts at different heights to follow the slope, but the pergola will be harder to square and the frame may rack over time. Levelling the ground or building a stepped base gives a more stable structure.
What is the best way to compact soil for a pergola base?
Use a hand tamper for small areas or hire a plate compactor for larger plots. Add fill material in thin layers, tamp each one firmly, and check the level as you go. The surface should feel solid underfoot with no soft patches.
How much slope can you level by hand for a pergola?
A drop less than the depth of your post footings is workable with hand tools. Steeper slopes may need a raised deck, retaining wall or professional earthworks to create a safe, level platform.